


The Sacrificial Anode
"Greater love than this no one hath than to give up one's life for a tank." -Rick Swenton
Before we begin, please don't call your water heater a "hot water heater." If the water was already hot, you wouldn't need a heater.
The sacrificial anode is a very important part of a water heater. It's a long metal rod, made of magnesium or aluminum. It extends through the tank's interior from top to bottom. It's just a solid metal rod but it serves an essential function. It attracts particles of iron, limestone or other minerals that are present in the water through an electrochemical process. The anode corrodes in place of the tank! When there is no metal left on the anode rod, the tank will begin to corrode and eventually spring a leak or burst. When the tank reaches this stage, the whole water heater needs to be replaced. The anode rod can last about 3 to 5 years or even longer depending on the quality of your water supply and how much hot water you use in your house. While the anode should be checked every 3 to 5 years, almost nobody ever does this. Why would a plumber want to check this? It can be a tough job to replace. If you don't replace it, the plumber can sell you a new water heater sooner. Who would ever think about calling a plumber to check this?
Let's talk about why such a simple job of replacing a piece of rod screwed into your water heater can be a challenging task. My heater is fueled with natural gas. The sacrificial anode is present on all tank style water heaters including ones fueled by electric and oil and also in water heaters found in recreational vehicles - RVs.
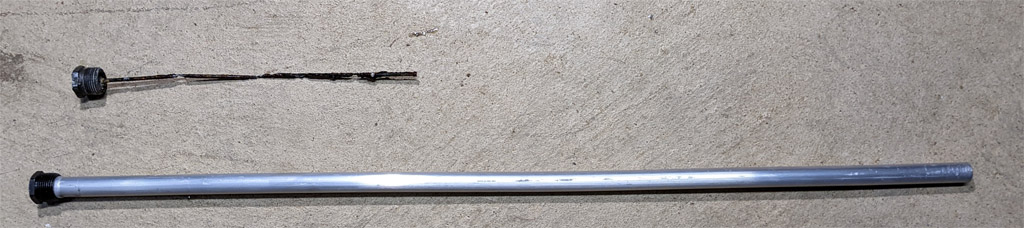
Here is a photo of the old and new anodes. The old anode is completely gone. I suspect the old anode was originally a three-piece unit with the pieces connected in series by a wire. The new anode was deformed a bit during shipping but that won't matter as it gives up its life to protect the tank. I found a work order from the original homeowner. They replaced the heater in 2012, so this anode is 10 years old assuming it had never been replaced before.

Here's an example of a 4 piece flexible anode. This is used when you do not have enough clearance between the top of the water heater and the ceiling above the heater to install the long one-piece anode.
How difficult is this job to replace the anode? Just unscrew the old one and screw in the new one. You would think it is simple until you reach various stages of the replacement. First, you need a 1-1/16 inch socket wrench. That's one and one sixteenth inch. That's a fairly large socket. I did not have one so I had to order one. I ordered a deep socket in case I needed the extra depth. I did have a 1/2 inch drive ratchet. When the socket arrived and I tried to unscrew the old anode, I realized the threads were bound very tightly. No matter how hard I tried I could not budge the threads. The deep socket was actually a bad choice because I needed the ratchet to be close to the cap. The taller socket was tilting to the side when torque was applied. I also made the mistake of ordering a 12 point socket instead of a 6 point socket. The top of the anode is a 6 point nut. The 12 point socket fits but tilts under torque and can wear the tips of the nut surfaces. A 6 point socket would fit snugly against the 6 surfaces of the nut.
One suggestion to increase the torque was to use a piece of pipe to extend the ratchet handle to increase the leverage. While this did increase the torque, there was a lot of twisting action applied to the water heater causing it to want to rotate. Another suggestion was to tighten a ratchet strap around the heater and use a piece of wood to place against the ratchet mechanism and the wall. This would prevent the heater from rotating.

I decided on another option. I have a pneumatic impact wrench and a compressor. I decided to order a regular depth heavy duty 6 point socket designed for impact wrenches. The standard chrome sockets may shatter under the stress of the impact wrench. The impact wrench was a gift and I never needed it until now. Fortunately I had some air tool oil on hand. Most air tools need to be lubricated during operation. It took a little time and the full pressure of my compressor to break the threads free. The nut was finally turning. In the photo above you can see the tight clearances between the impact wrench, the draft hood and the hot water pipe. That wire goes to a temperature sensor so that my home automation system can keep track of the water temperature and alert me to any problems.

This is what the old anode looked like as I removed it from the tank. Before removing the old anode, all you have to do is shut off the cold water going into the tank and drain about a gallon of water from the drain valve at the bottom of the tank. That will relieve the pressure and lower the water level below the hole that will be opened when you remove the anode.

This is what the new rod looked like going in.
Should teflon tape be used on the threads of the anode cap? Experts say YES. The cap of the rod needs to make electrical connection to the tank. Some think the teflon tape will insulate the threads. Actually, when you screw in the rod, the threads will puncture the tape and push it slightly away from the tips of the threads, making contact with the tank threads in many spots. The teflon will provide a good water seal, add lubrication to the threads, and make it easier to un-screw the rod later. To confirm this, I used an ohm meter to measure the continuity between the hex head on top of the anode to the copper water pipe.
Since the old anode was completely consumed I have no idea how much corrosion the tank endured. It is highly possible I may have doubled the life of this tank. It is most likely I have at least extended its life a few more years. I will remove the anode again in three years to see how it is surviving. If you decide to try to replace your own anode, shop around. I got mine online at a plumbing supply house for about $28. Other places had the same part priced at $79 or more.
Part 2
In February of 2024 I decided to pursue a more modern solution to the Sacrificial Anode.

This is the Corro-Protec powered anode for residential water heaters. It sells for about $150 and is guaranteed for 20 years. Conventional anodes are designed to disintegrate over the years. They sacrifice themselves and corrode in place of the tank. After some time the anode will become totally eaten away and the tank will begin to corrode. With a powered anode, the anode itself does not corrode. The corrosion prevention is electro-chemical.
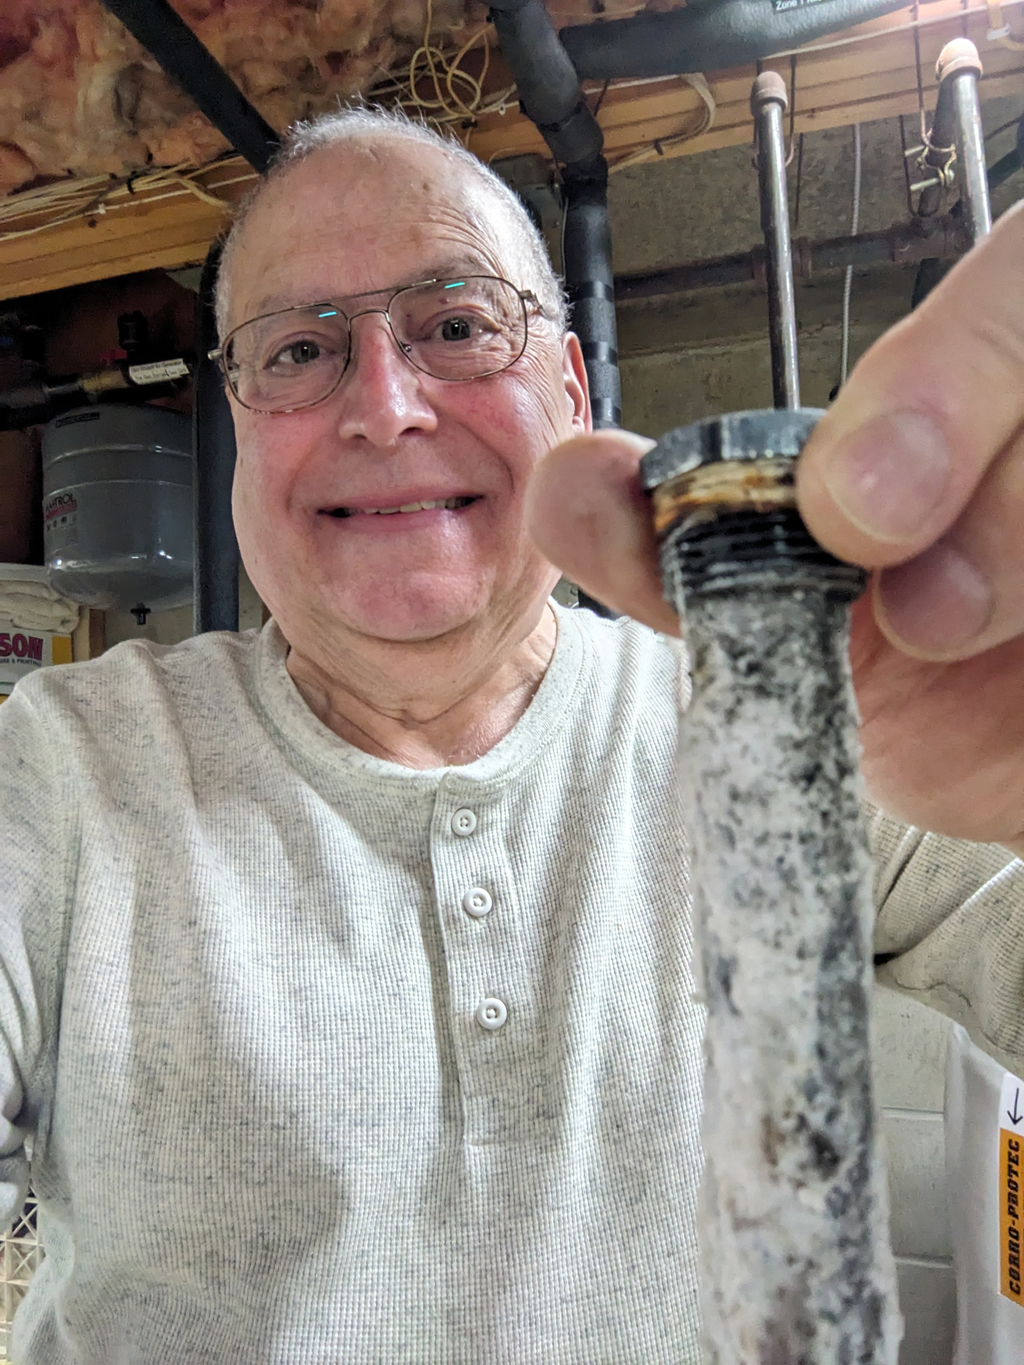
I removed the anode I replaced in October 2022. A year and a half later this is what the new anode looked like! There was so much build up around the rod that it was hard to pass the rod up through the threaded opening in the tank.
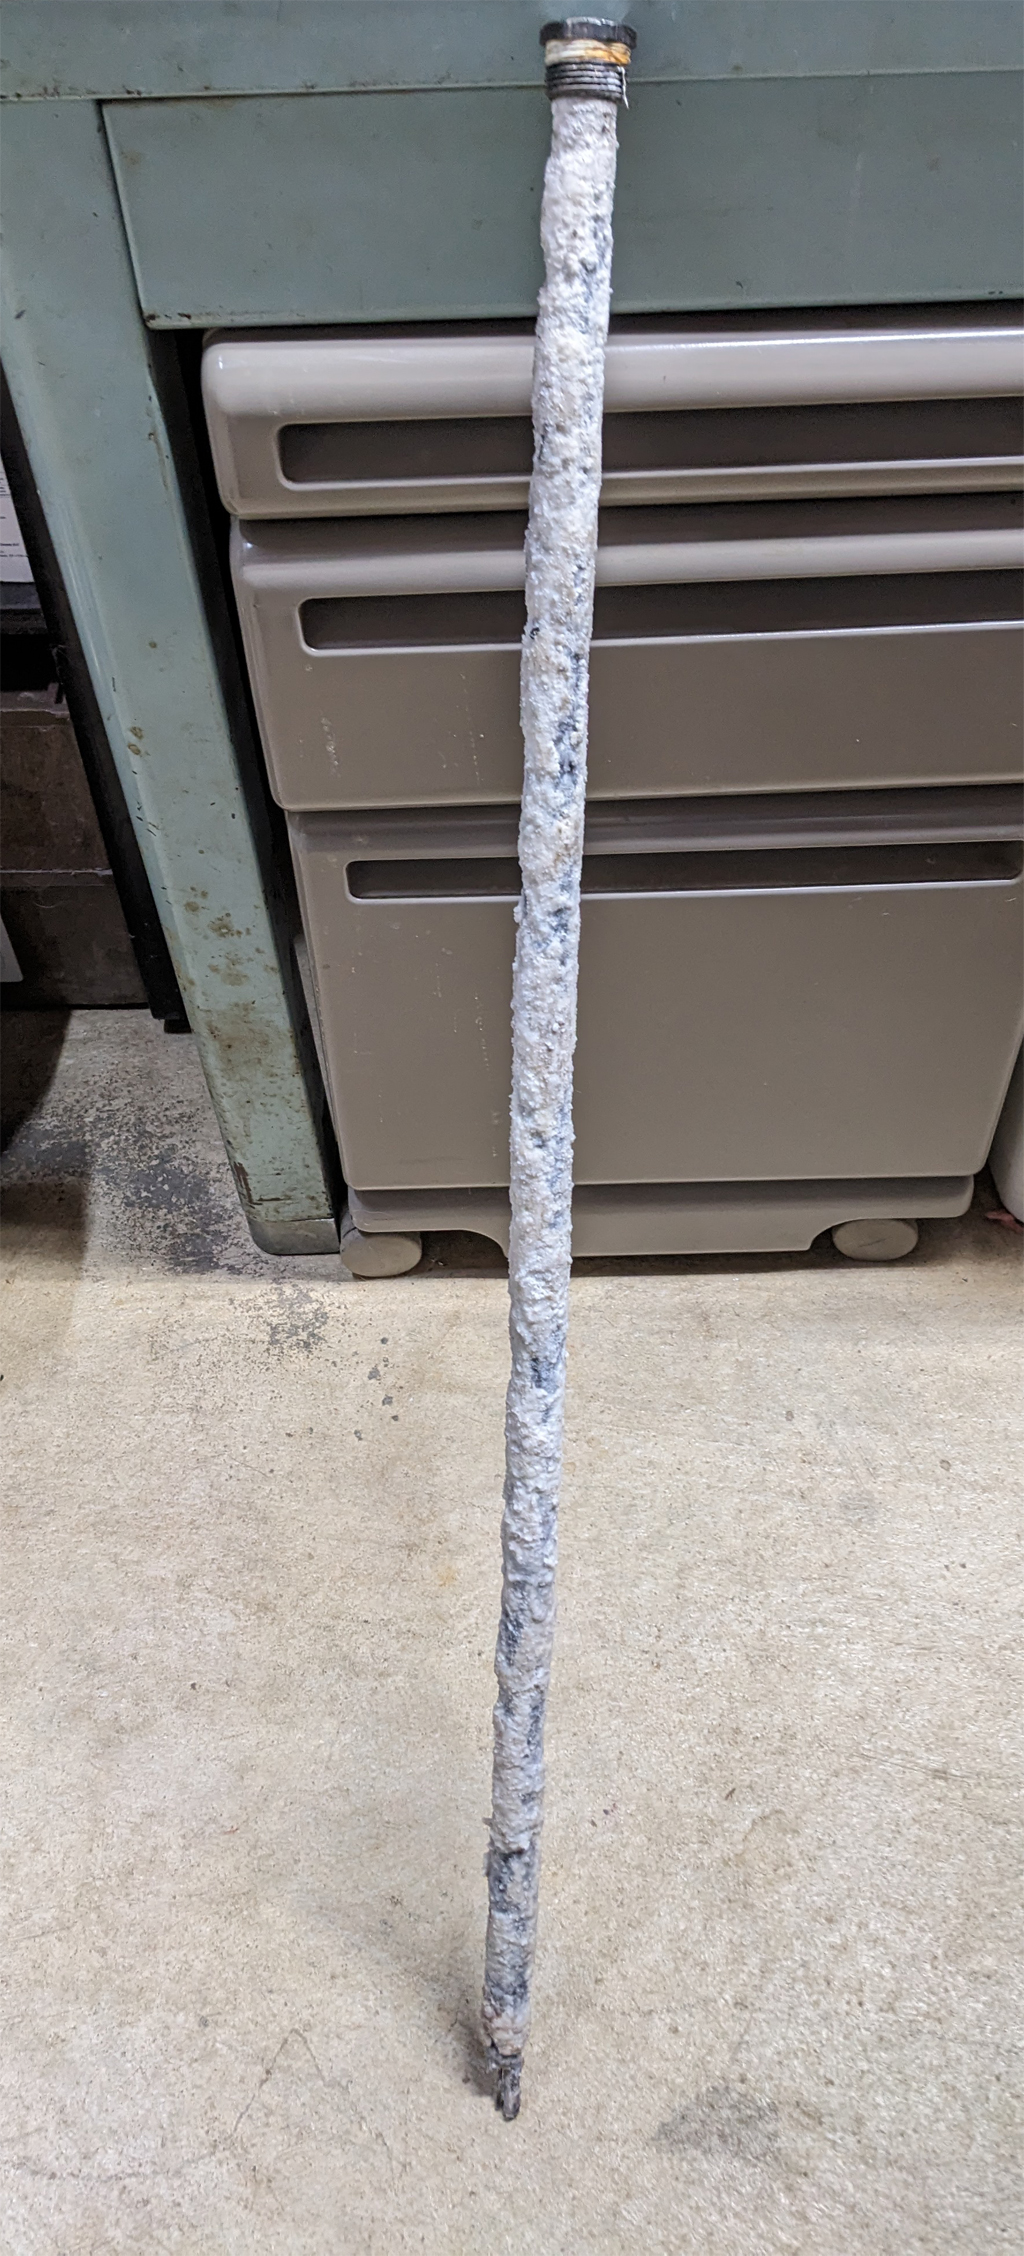
Here's the full-length view of the 1.5 year-old anode. It is amazing how degraded it became in less than two years.
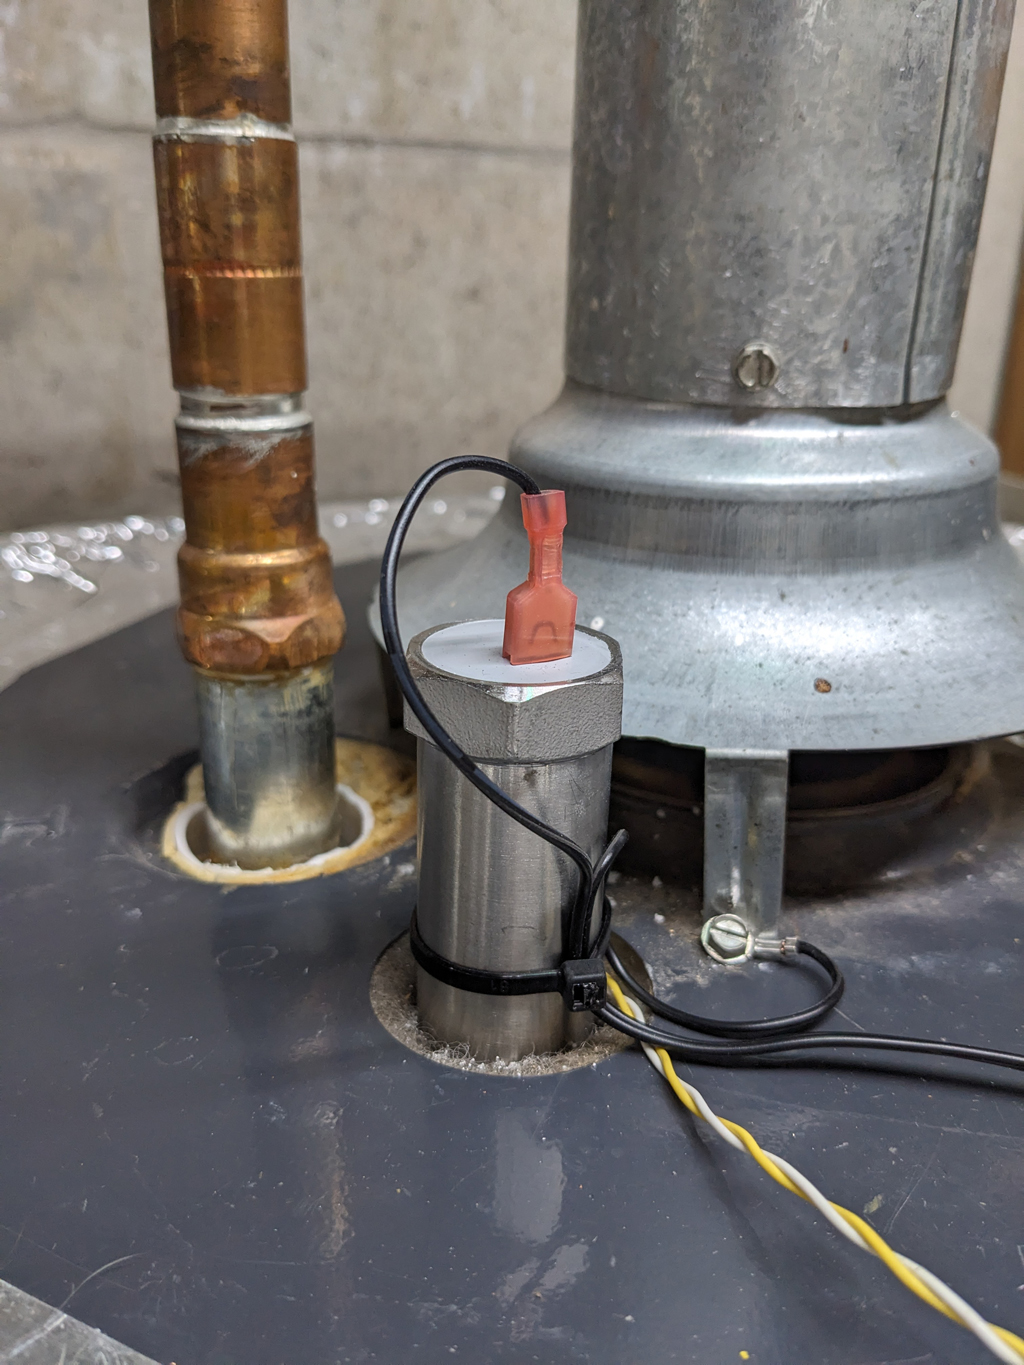
This is a view of the new powered anode installed in the tank. It sits higher than the original which was flush with the top of the tank. Notice the power wire. One conductor goes to the terminal on top of the anode. The other conductor goes to a screw that is grounded to the tank.
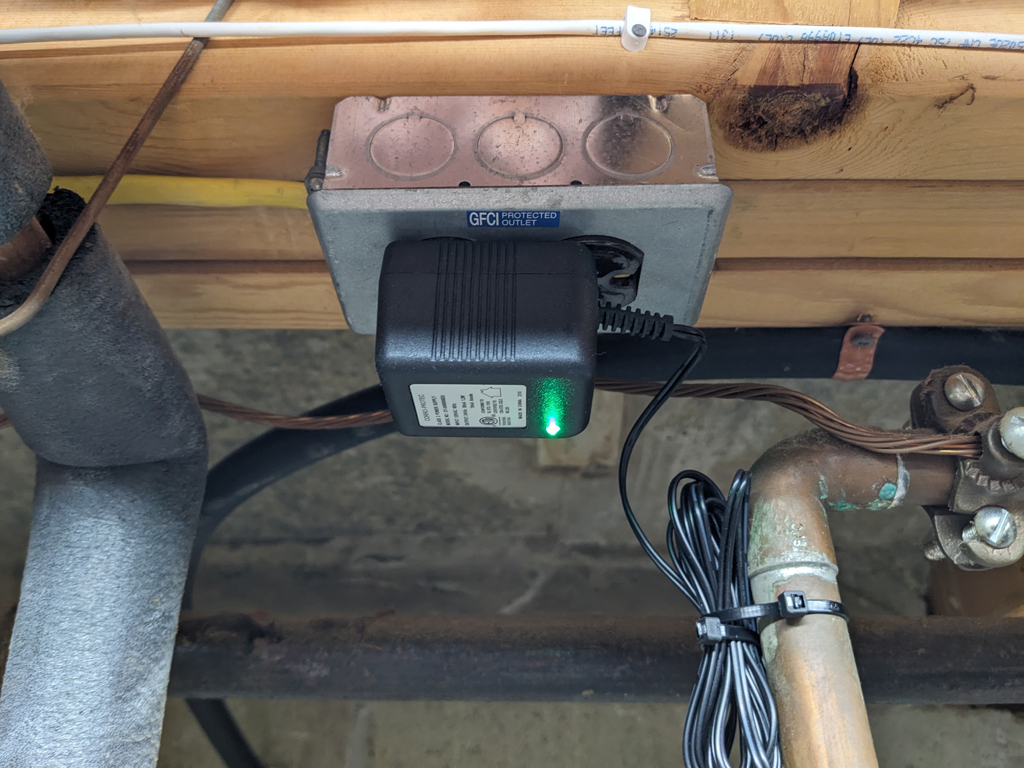
To power the anode I had to install an electrical outlet near the heater to plug in the power supply. There is a small LED light that illuminates when the anode is connected and operating properly.
It's hard to tell if this investment will pay out over time. The tank probably went a long time with an old anode before I changed it. Only time will tell.