

MR stands for Digital Mobile Radio. It is one of many systems in use on the Amateur Radio Bands in use by "Ham Radio Operators." It came from the commercial land mobile radio world as you would find in public safety vehicles or businesses. The advantages of using a digital radio as a two-way radio are similar to the benefits of entertainment digital radio and TV. The quality is improved. There is no static. Battery life for portable hand-held radios is improved. There is the ability to transmit and receive data. The signals occupy less space in the radio spectrum. DMR uses a time-division multiplex protocol in two time slots per channel. That means two groups of people can carry on two independent converastions on a single radio channel.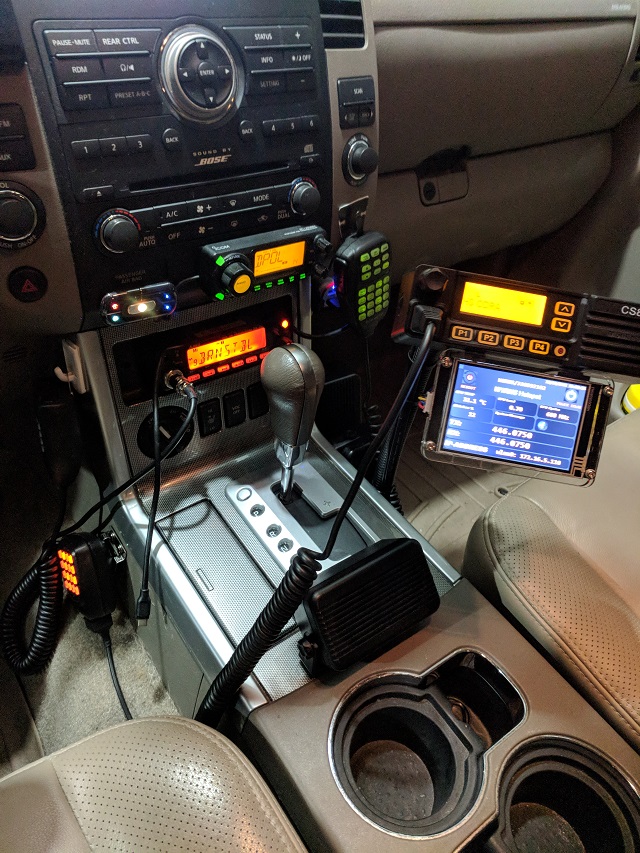
In the car I installed a Connect Systems CS800D VHF/UHF Transceiver for DMR. I already have a 6-Meter transceiver installed in the dashboard and there's no room for another radio. Fortunately the CS800D has a removable control head. I installed the main part of the radio under the passenger seat and installed the control head on a flexible mount anchored to the passenger seat bolt. The control head is the black part with the knobs and buttons. The screen below it is not part of the radio. More on that later. The flex mount allows the radio to be angled for optimum visibility and operation.
For many years Hams have set up repeaters across the country. A repeater is a mountain top relay tower that extends the communication range of your car or handheld radio. Using a repeater from the car or handheld radio Hams could talk to others much further than possible by trying to go direct from one radio to the other. Public safety and businesses use repeaters for their radios. Often the systems are shared. For example, a town's police, fire and public works could share one system and not hear each other's communications. This is called Trunking. Using Talk Groups each department would have a unique identifier so only radios in your Talk Group can talk to each other.
For Ham Radio, one of the big features of DMR is Talk Groups. Think of them like chat rooms. They are virtual radio channels. While the towns organize their Talk Groups for Police, Fire, and Public Works the Hams organize their Talk Groups as local, state, regional, national, country and worldwide. A DMR repeater is connected to the internet so it can talk to other DMR repeaters or Hotspots that are also on the internet. A Hotspot is like a mini repeater. If for some reason you are not close to a repeater but you have internet access you can use a Hotspot as your own local private repeater to get on the DMR network.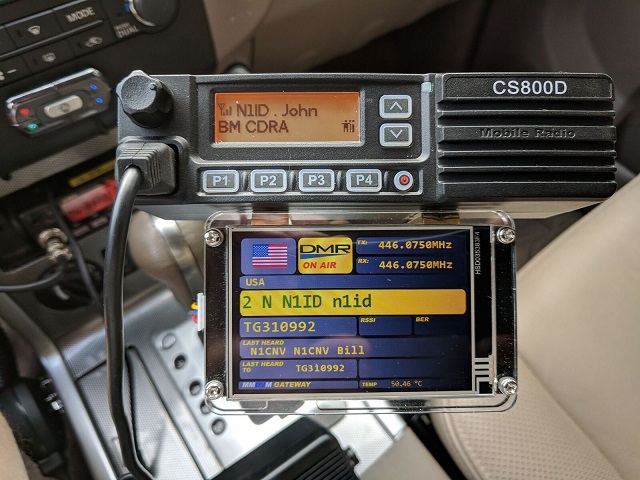
I installed such a Hotspot in my car. I have several friends in Connecticut and we used a DMR repeater there. I recently moved out of state. The DMR repeaters where I live now are not on the same network as the ones by friends use in Connecticut. With the Hotspot in my car or house I can use it as an extention of the repeater in Connecticut and still talk to my friends. To get internet access in the car I use my cellphone and tether the hotspot to the phone's wifi signal. The display you see under the radio is connected to the Hotspot in the glove box. The display shows the person's call sign, name, DMR ID and the Talk Group number.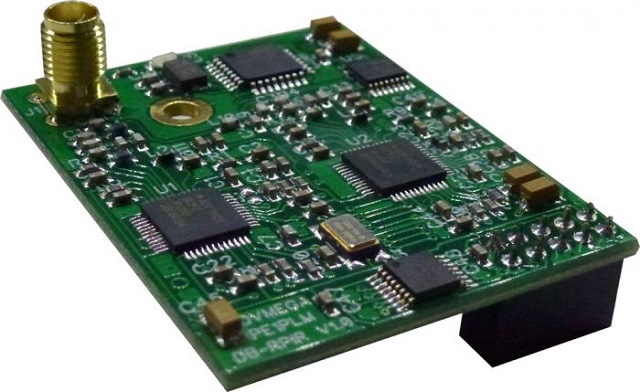
This is one part of the Hotspot. This is a radio transceiver with a digital modem. The modem converts signals between analog and digital and vice versa. This particular modem board is a DVMega dual band VHF-UHF transceiver. The SMA jack in the upper left is where the antenna screws on. The black connector in the lower right pluggs into the Raspberry Pi GPIO Bus Pins. Another more popular modem board is the MMDVM Hat. This one is primarily UHF and does come in a duplex version.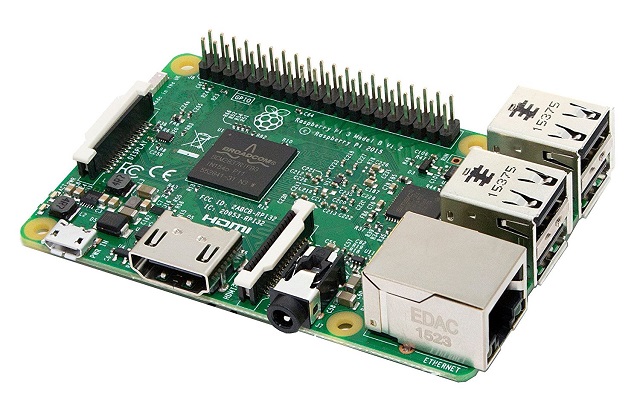
The modem transceiver board plugs into a Raspberry Pi single board computer. The Pi3 has onboard Wifi and ports than can support an external display.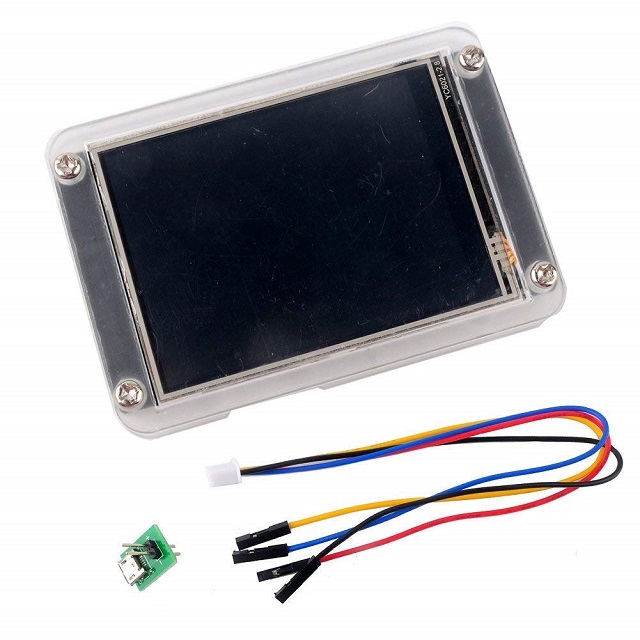
This is a Nextion color touch screen display. It plugs into the Raspberry Pi and communicates over a simple serial connection. The signal level is TTL so you will need to provide a TTL to USB converter to shift the voltage levels. You will also need to download and possibly customize the screen content. This can be done by either loading the screen layouts over serial or placing the file on an SD card and booting the screen with the card installed. After the screens are loaded you can remove the SD card and reboot. The screens are like static templates with blank fields. The Pi-Star hotspot software writes the dynamic information into the blank fields as it changes.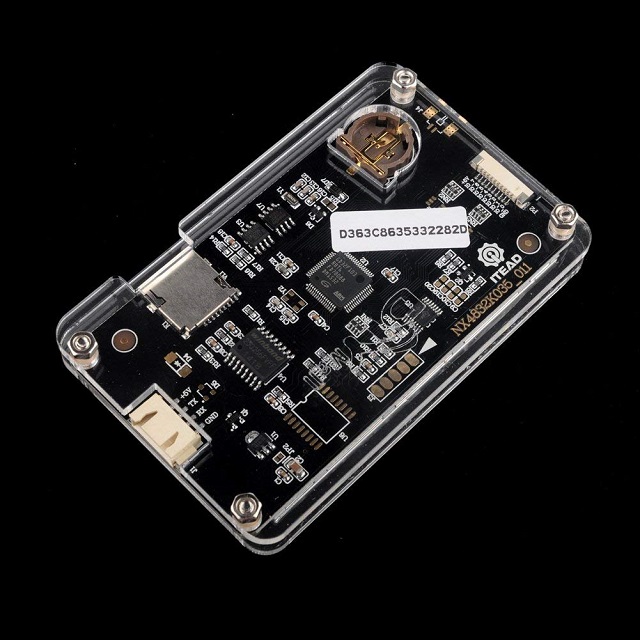
This is the rear view of the Nextion display. The SD memory card slot is used to load the various display screens and programming into the board. Some very nice screens have been developed by the Ham community. Nextion provides a free editor so you can make your own or modify someone else's design.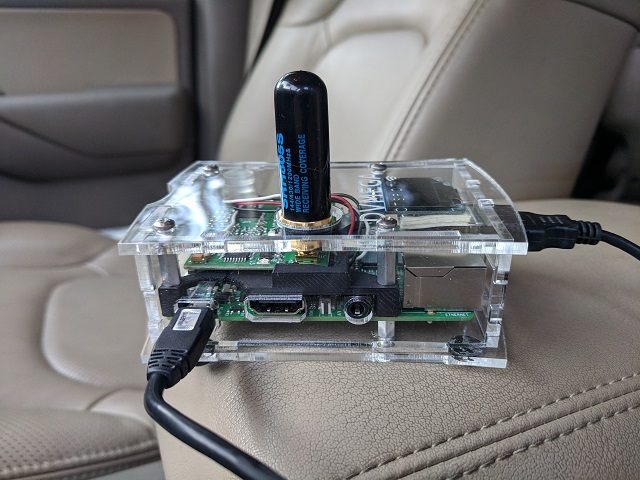
This is the assembled Hotspot I have in the glove box. You can see the DVMega radio board with the antenna on top and the Raspberry Pi computer board underneath. The Nextion display plugs into one of the USB ports. The Hotspot gets its power from a mini USB cable plugged into a power supply connected to the cigarette lighter.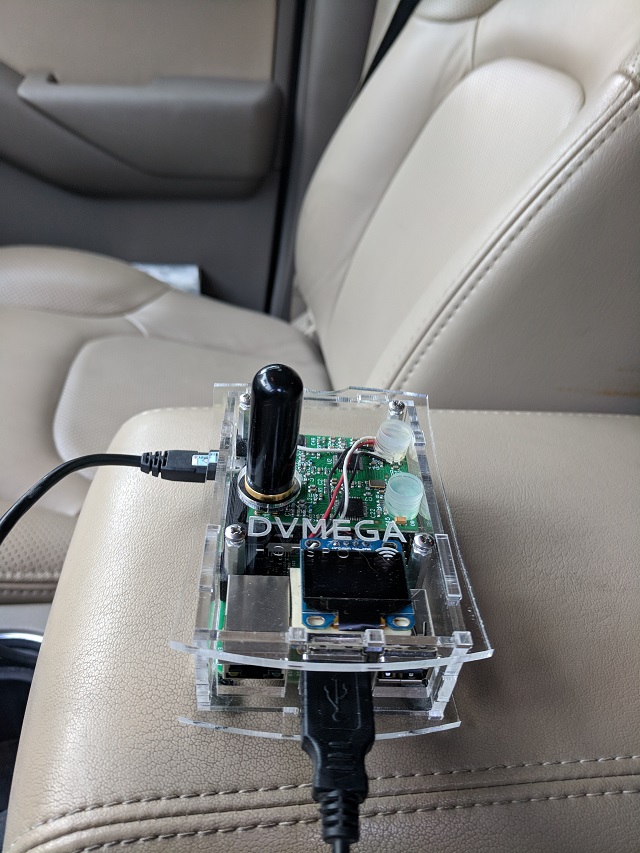
Here's a different view of the Hotspot. The black rectangle under the word DVMega is a 1" OLED display. It's turned off because I am using the larger Nextion screen under the control head at the dashboard. The whole hotspot just drops into the center armrest 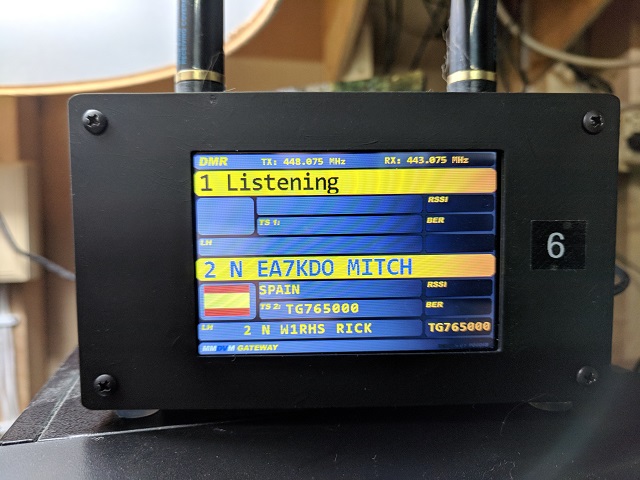
Here is a version of a duplex hotspot I use in the house. Everything is in the box except for the antennas mounted on the top. Here you can see a signal coming from Spain. The ham talking is Mitch who was formerly from the US. His callsign is EA7KDO and he is on one of the worldwide talk groups. Mitch is not actually on a DMR network. He is using a different protocol called NXDN and is using a new feature that allows us to bridge calls between dissimilar digital protocols.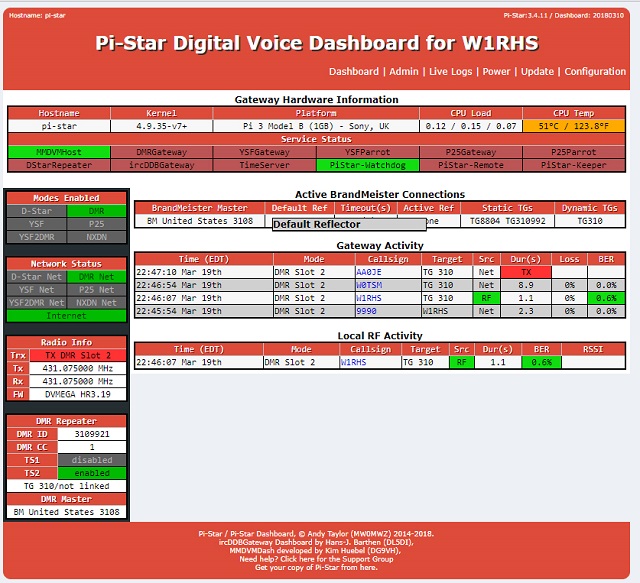
The software to control the Hotspot is called Pi-Star. It is freely available on the internet. You download the image and place it on an SD card. Insert the card into the Raspberry Pi, start it up and configure the settings.
DMR Radio in the Car
- Details
- Hits: 3642